Flossing is one of the most important habits for maintaining good oral health, but many people brush and skip this crucial step in their daily routine. Dental floss is designed to remove plaque, bacteria, and food particles from between your teeth and along the gum line, which are areas a toothbrush can’t reach.
Learning how to floss properly helps prevent gum disease and tooth decay, keeping your teeth and gums healthy for life. Whether you use traditional dental floss, dental tape, a floss threader, or a water flosser, the right technique makes all the difference. Teeth that are regularly flossed are less likely to develop cavities, tartar buildup, or periodontal disease.
Why Flossing Is Essential for Good Oral Health
Most people brush their teeth daily, but brushing removes only the sticky film from tooth surfaces, not the plaque or food particles stuck between them. If you ignore these areas, bacteria accumulate, which can lead to gum disease (gingivitis and periodontal disease), tooth decay, bad breath, and unhealthy gums.
These benefits highlight why flossing is a vital part of your daily oral hygiene routine:
- Remove Plaque. Floss physically disrupts sticky film and bacterial dental plaque in areas your toothbrush can’t reach.
- Reduce Risk of Gum Disease. Flossing helps prevent inflammation and infection of the gum tissue, which can lead to periodontal disease.
- Prevent Tooth Decay and Cavities. By cleaning between teeth, flossing reduces the risk of decay on hard-to-reach tooth surfaces.
- Eliminate Odor-Causing Food Particles. Removing trapped debris reduces the number of bacteria that contribute to bad breath.
- Protect Dental Work. Flossing around crowns, bridges, and braces helps keep dental work in top condition.
How to Floss Teeth Properly
Flossing isn’t just about moving the string between your teeth; it’s about using the proper flossing technique to remove as much plaque and bacteria as possible. Here’s how to floss correctly, no matter which type of flossing tool you prefer.
Step 1: Choose the Right Type of Floss
There are many types of flosses available, including waxed, unwaxed, flavored, and specialized flosses like super floss or electric flossers. Choosing the right floss can improve interdental cleaning and overall oral health.
Type of Floss | Best For | ADA Seal? |
Waxed floss | Tight contacts; slides easily | Sometimes |
Unwaxed floss | Normal spaces; squeaks to signal clean | Sometimes |
Dental tape | Wider contacts; comfortable for older adults | Sometimes |
Regular floss | General use; available as waxed/unwaxed | Sometimes |
Floss threader | People with braces or dental work | N/A (adjunct) |
Water flosser | Sensitivity, braces, or dexterity challenges | Sometimes |
Step 2: Measure and Grip the Floss
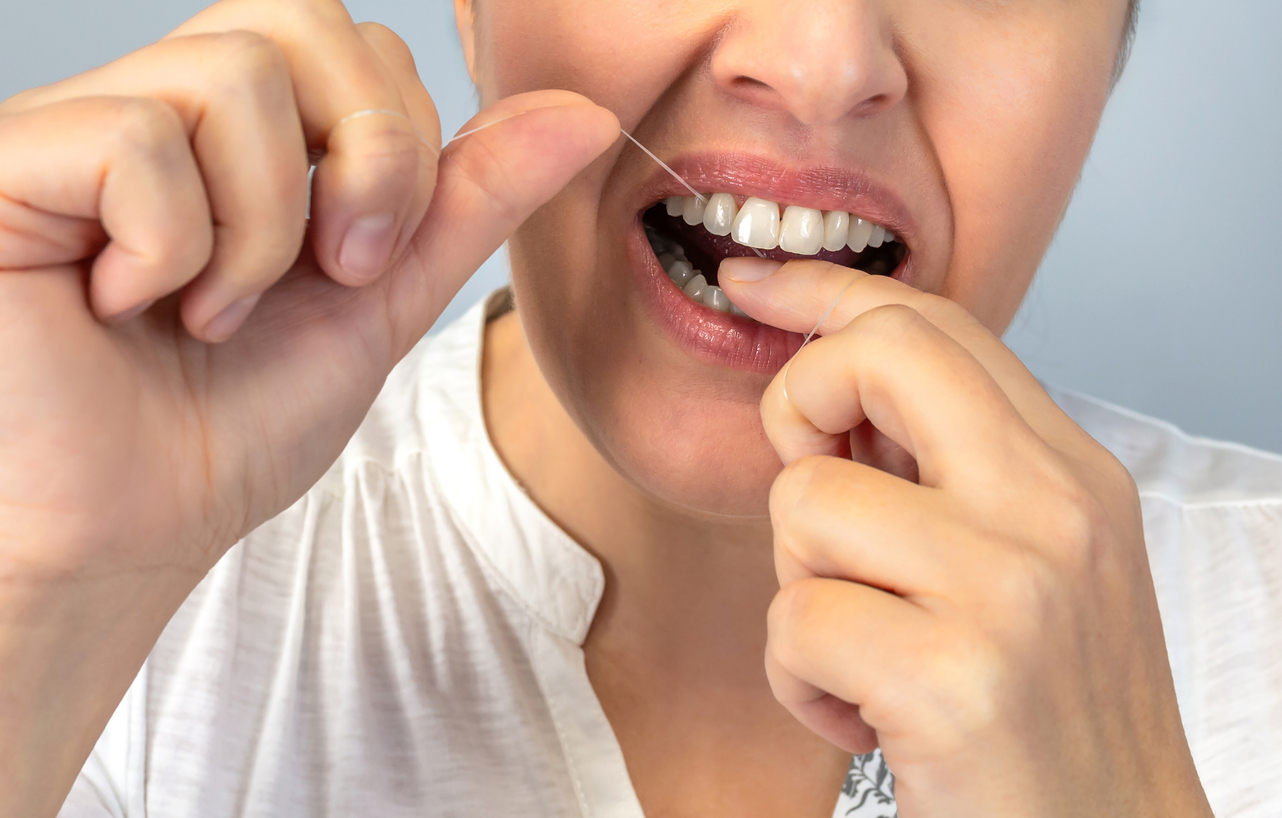
Cut a piece of floss that’s approximately 18 inches in length, allowing for a little extra if you prefer greater control while flossing. Wrap most of the floss around the middle fingers of both hands, leaving about 1 to 2 inches to work with. Grip the floss firmly between your thumbs and index fingers, using gentle pressure to guide it between your teeth.
Step 3: Floss Between Your Teeth—The Proper Flossing Technique
- Gently slide the floss between two teeth, using a gentle back-and-forth motion. Never snap it, as this can injure the gum tissue.
- Curve the floss into a “C shape” against the side of one tooth, hugging the tooth surface all the way to the gum line.
- When the floss reaches the gum line, gently curve it beneath the gum to clean effectively and prevent damage to the tissue.
- Gently rub up and down along the tooth. This up-and-down motion effectively removes plaque and food particles.
- Slide the floss slightly under the gumline without forcing it.
- Repeat for each tooth, using a clean section of floss. Don’t forget to floss the last molars and around the back teeth.
Flossing the wrong way, such as snapping the floss or using a harsh sawing motion, can harm your gum tissue and should be avoided.
Remember: Proper technique is more important than the tool. Whether using waxed, unwaxed, or dental tape, follow these steps for success.
Flossing Tips and Common Mistakes
Dos:
- Floss tightly to the tooth, but never snap it into the gums.
- Floss daily. Making it a daily habit greatly lowers your risk of oral disease.
- Use the right technique: up and down, not sawing side to side.
- Repeat steps for every contact; don’t skip between any two teeth
Do Nots:
- Don’t reuse the same section of floss.
- Don’t skip flossing just because your gums bleed at first. Bleeding is common with unhealthy gums and usually improves with consistent daily flossing.
Flossing With Braces or Dental Work
Flossing when you have braces or other tools in your mouth (like bridges or implants) can be a challenge, but it’s crucial for preventing decay.
Best Tools for Braces and Dental Work
Flossing Tool | Why Use It |
Floss threader | Helps thread regular or waxed floss under orthodontic wires |
Water flosser | Direct streams remove food particles, plaque, and bacteria |
Interdental brushes | Clean around brackets, under wires, and between teeth |
How to Floss With Braces (Step by Step)
- Use a floss threader or orthodontic floss to get the strand under the main wire.
- Slide the floss gently between your teeth and curve it into a C shape, following the proper flossing technique.
- Floss both sides of every tooth, including around brackets and under wires.
- Use a water flosser for areas hard to reach with traditional floss.
Extra tip for older adults with bridges or dental work: A water flosser or interdental brush can make flossing easier and more effective.
Alternative and Adjunct Flossing Tools
Not everyone finds traditional dental floss easiest to use. If regular floss isn’t practical for your needs, other flossing tools, such as water flossers, interdental brushes, and floss picks, may work better for you.
Common Flossing Tools
Tool | Best Use | Pros | Cons |
Traditional dental floss | Most situations | Effective, inexpensive | Requires dexterity |
Floss picks | Travel, kids, limited mobility | Convenient, single-handed use | Can miss tight areas |
Interdental brush | Larger gaps, dental work, and older adults | Cleans large spaces, reusable | Can’t fit in tight spaces |
Water flosser | Braces, implants, sensitive gums | Easy, gentle, ADA Seal available | Expensive, needs power |
Whatever tool you choose, the most important thing is to floss daily. Ask your dentist or dental hygienist which flossing tool is best for your mouth.
Easy Ways to Make Flossing a Daily Habit
Making flossing a daily habit is key to long-term oral health.
- Use a floss threader or special orthodontic floss to guide the strand beneath the archwire.
- Gently slide the floss between your teeth and curve it into a C shape around each tooth, using the correct flossing method.
- Floss both sides of every tooth, including around brackets and under wires.
- Use a water flosser for areas hard to reach with traditional floss.
Make Oral Health a Priority: Contact Norton Dental Group!
By using the right flossing method regularly, you can lower your risk of gum disease, cavities, and bad breath, while also supporting healthy gums. If you experience persistent bleeding or have dental work, consult your dentist or hygienist for personalized advice and recommendations on the best tools.
Ready to take your oral health to the next level? Schedule your next dental checkup at Norton Dental Group! Whether you need guidance on the best flossing tools or support for your unique dental needs, Norton Dental Group has you covered.
Don’t wait—call us today to book your appointment and keep your teeth and gums in top condition for years to come!